Peppermint Mocha Cookies, Fudgy Centers With White Chocolate Stripes
In this article:
- Why these cookies taste like the drink, only chewier
- Espresso in the butter and cocoa in the flour
- The peppermint dose that stays cool, not medicinal
- Dark crumb, soft center and crisp little edges
- Ingredients
- Mixing and chilling the cookies, step by step
- The short bake and the soft center test
- White chocolate stripes and candy cane timing
- Cookie box variations on the same mocha base
- Freezing dough balls for a December head start
- Questions about peppermint mocha cookies
- Dark, cool and ready for the exchange
Peppermint mocha cookies turn the familiar holiday drink into a dark, chewy cookie with a fudgy middle and a cool finish. Cocoa leads, espresso deepens the chocolate, and peppermint arrives last like the first breath outside a warm cafe.
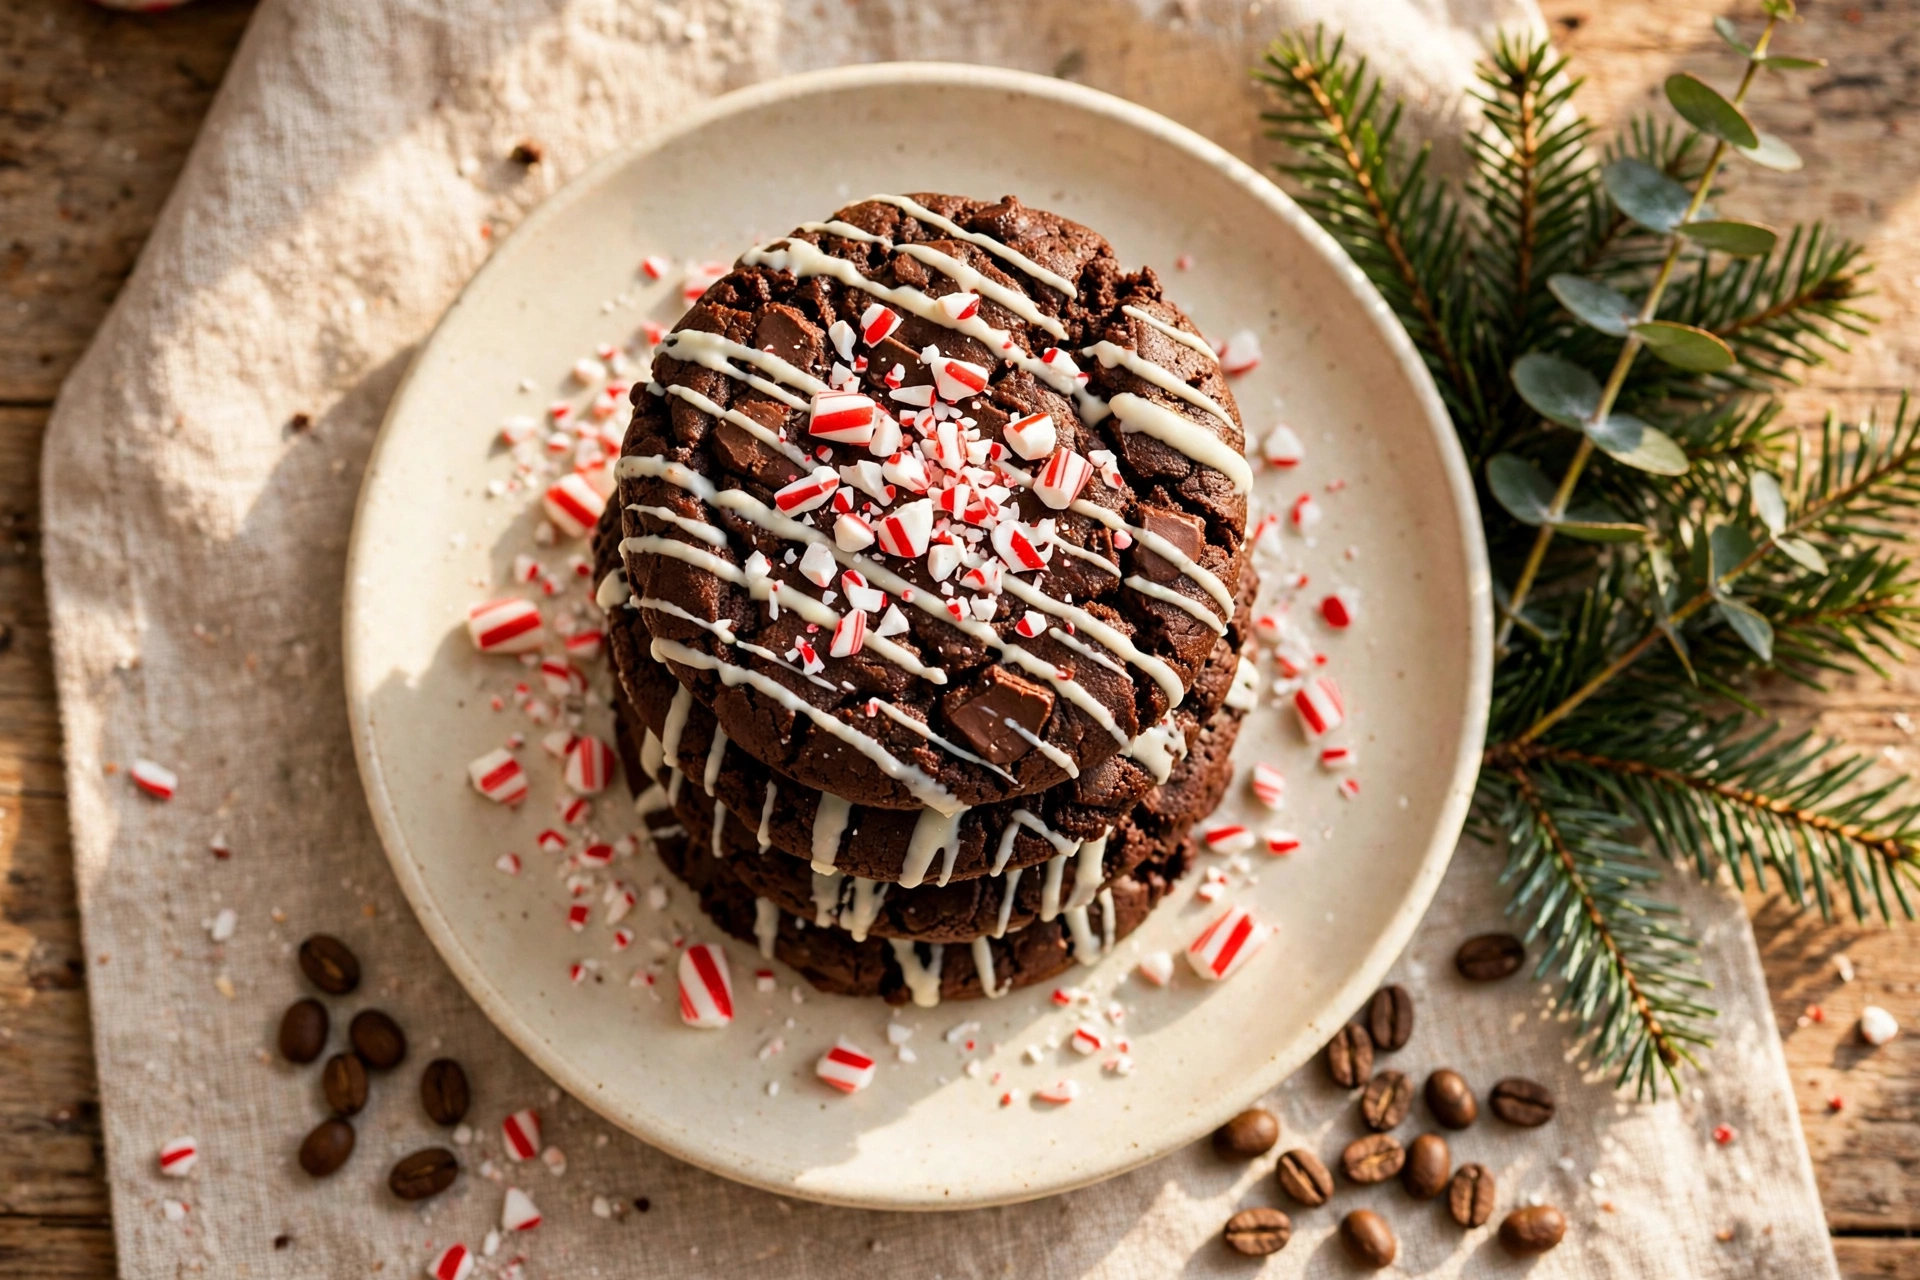
The tops carry thin white chocolate stripes and a snowfall of crushed candy cane. They look unmistakably festive, but the real work happens earlier: espresso beaten into the butter, a proper chill, and a bake stopped while the centers still look tender.
This is a cookie built for an exchange box. The crumb stays moist for days, the dough balls freeze beautifully, and the decoration takes five minutes once the baked cookies are completely cool.
Why These Peppermint Mocha Cookies Taste Like the Drink, Only Chewier
Peppermint mocha cookies succeed when chocolate remains the main event. Espresso does not need to announce itself as coffee; its job is to make the cocoa taste darker, rounder and more complete.
Brown sugar gives the centers chew and a little molasses depth, while granulated sugar helps the edges set. A small amount of cornstarch softens the crumb, and Dutch process cocoa brings the deep color that makes the white topping look dramatic.
The chill is part of the recipe, not a suggestion tucked into the notes. Cold dough spreads slowly, the cocoa and flour hydrate, and the peppermint has time to distribute through the fat instead of tasting sharp in isolated bites.
Espresso in the Butter and Cocoa in the Flour
Instant espresso powder is beaten with the butter and both sugars at the start. The fat coats the fine powder and spreads it through the dough, so the mocha flavor is even from the first cookie to the last.
Use instant espresso powder or very fine instant coffee. Coffee grounds are not a substitute because they stay gritty and release flavor unevenly. If the instant coffee is coarse, crush it between two spoons before it goes into the bowl.
Dutch process cocoa is the first choice for color and a smooth chocolate flavor. Natural cocoa works, but the cookies will look lighter and taste a little sharper. Keep the baking soda amount the same and expect a subtle change rather than a failure.
Whisk the flour, cocoa, cornstarch, baking soda and salt until no pale streaks remain. Cocoa likes to clump, and a dry pocket in the finished dough can bake into a bitter spot. A fine whisk solves the problem before mixing begins.
The Peppermint Dose That Stays Cool, Not Medicinal
Peppermint extract is powerful because it is concentrated and because chocolate carries it efficiently. Three quarters of a teaspoon flavors the whole batch while leaving room for vanilla to soften the edges.
Measure over a small dish rather than directly over the mixing bowl. One extra splash can push the cookies toward toothpaste territory, and there is no reliable way to dilute extract once it is in the dough.
Use peppermint extract, not generic mint extract. Mint blends often include spearmint, which reads green and chewing gum like beside cocoa. Peppermint has the clean, cold note associated with candy canes and the drink that inspired the cookie.
The extract is only the base note. Crushed candy cane on top adds a second, brighter hit and a delicate crunch. Keeping the two layers separate gives the baker control: cool flavor inside, festive sparkle outside.
Dark Crumb, Soft Center and Crisp Little Edges
The ideal cookie is thick enough to bend slightly when warm and then settle into a dense chew. Its edge should feel set and faintly crisp, while the center remains dark and almost brownie like.
An egg plus an extra yolk enriches the dough without adding the water found in a second full egg. That yolk helps the center stay fudgy and gives the crumb a smooth finish rather than a cake like crumb.
Two tablespoon portions are the sweet spot for an exchange. They are generous enough to show the soft center when broken, but small enough to pack two dozen into a box without crowding larger decorated cookies.
Do not flatten the dough balls before baking. Their height is protection against drying. The heat will relax them into rounds, and a gentle nudge with a round cutter after baking can tidy any uneven edges.
Ingredients for Peppermint Mocha Cookies
- 3/4 cup (170 g) unsalted butter, at cool room temperature
- 3/4 cup (150 g) packed dark brown sugar
- 1/2 cup (100 g) granulated sugar
- 1 tablespoon instant espresso powder
- 1 large egg, at room temperature
- 1 large egg yolk, at room temperature
- 2 teaspoons vanilla extract
- 3/4 teaspoon peppermint extract
- 1 3/4 cups (220 g) all purpose flour
- 2/3 cup (60 g) Dutch process cocoa powder
- 1 tablespoon cornstarch
- 1 teaspoon baking soda
- 1/2 teaspoon fine salt
- 1 cup (170 g) semisweet chocolate chips
- 4 ounces (115 g) white chocolate, chopped, for the stripes
- 1/3 cup (55 g) crushed candy canes, for topping
Mixing and Chilling Peppermint Mocha Cookies, Step by Step
The dough is quick to mix and slow to chill. Keep the mixer low once flour enters the bowl, and stop as soon as the last dry streak disappears.
- Beat the butter, brown sugar, granulated sugar and instant espresso powder for 2 to 3 minutes, until lighter in color and fluffy. Scrape the bowl once so no plain butter stays at the bottom.
- Beat in the egg, then the egg yolk, mixing until each is absorbed. Add the vanilla and peppermint extracts and mix until the dough looks smooth and glossy.
- Whisk the flour, cocoa powder, cornstarch, baking soda and salt in a separate bowl until the mixture is one even dark color.
- Add the dry ingredients to the butter mixture in two additions. Mix on low only until no flour or cocoa streaks remain. The dough will be thick and sticky.
- Fold in the semisweet chocolate chips with a spatula, reaching to the bottom of the bowl so the chips are evenly distributed.
- Cover and refrigerate the dough for at least 2 hours and up to 48 hours. This rest hydrates the cocoa and flour and firms the butter for thick cookies.
- Heat the oven to 350°F (175°C). Line two baking sheets with parchment. Let very cold dough stand at room temperature for 10 minutes so it can be scooped cleanly.
- Scoop 2 tablespoon portions and roll them into balls. Place them 2 inches apart on the prepared sheets, keeping the remaining dough refrigerated between batches.
- Bake one sheet at a time for 10 to 12 minutes, until the edges look set and the centers still appear slightly soft and puffed.
- Cool on the baking sheet for 10 minutes. The centers will finish setting as they cool. Move the cookies to a wire rack and cool completely before decorating.
- Melt the white chocolate gently in short microwave bursts, stirring between each. Drizzle thin stripes over the cold cookies and sprinkle immediately with crushed candy cane.
- Let the topping set for 30 minutes at room temperature before stacking or boxing the cookies.

The Short Bake and the Soft Center Test
Chocolate cookies hide doneness because they never turn golden in a useful way. Judge them by surface and movement instead. The edges should look matte and stable, while the center still has a soft sheen and a gentle puff.
At 10 minutes, open the oven only long enough to look. If the center appears wet and spreads when the pan is nudged, give the sheet 1 more minute. If only the very middle looks tender, take the cookies out.
Carryover heat is part of the formula. The hot pan continues to set the bottoms and centers during the 10 minute rest. Moving the cookies too soon can tear them, while waiting too long on a hot sheet can dry the edges.
If a cookie spreads too much, the dough was warm or the butter began too soft. Chill the remaining balls for 20 minutes and lower the portion slightly. If cookies stay tall and dry, they were probably baked past the soft center stage.
White Chocolate Stripes and Candy Cane Timing
White chocolate gives the dark cookies their holiday contrast without covering the mocha flavor. Melt it slowly and keep water away from the bowl. Even a few drops can make white chocolate seize into a grainy paste.
A spoon creates rustic stripes, while a small piping bag or zip top bag gives finer lines. Work over a rack set on parchment so loose candy falls onto a clean surface and can be reused for the next cookies.
Add crushed candy cane immediately after each stripe, not after the whole tray is decorated. White chocolate begins to skin quickly at room temperature. Candy added late sits on top and falls off in the box.
Crush the candy to a mix of fine dust and small shards. Powder alone disappears, while large chunks are hard to bite and can pull at the topping. Small pieces give sparkle and a clean peppermint crunch.
Cookie Box Variations Built on the Same Mocha Base
For a deeper chocolate box, replace the white stripes with a half dip in melted semisweet chocolate and keep the candy cane sparse. The finish is darker and less sweet, a good contrast beside pale shortbread.
For a peppermint bark effect, place one decorated cookie beside pieces of homemade peppermint bark rather than putting both flavors in the same bite. The box gains variety while the cookie keeps its fudgy center.
Add orange zest to the dough when peppermint is not the goal. One teaspoon of finely grated zest turns the base into a dark chocolate orange cookie, and the white chocolate topping still works. Leave out the candy and use a few strips of candied peel.
For a sweeter neighbor in the same tin, pair the batch with peppermint white chocolate fudge, but pack the fudge in its own parchment sleeve. Strong peppermint and moisture can migrate between unwrapped sweets.
The base also supports chopped toasted hazelnuts or a pinch of cinnamon. Keep the espresso amount unchanged when experimenting. It is the quiet ingredient that holds the chocolate together even when the top note changes.
Freezing Dough Balls and Baking for Guests All December
Portion the chilled dough, roll the balls and freeze them on a parchment lined tray until solid. Transfer them to a freezer bag with the air pressed out. The dough keeps well for up to 2 months.
Bake frozen balls without thawing and add 1 to 2 minutes. This is the best route for a cookie box because the baked texture stays fresh and the kitchen work can be split across several short sessions.
Finished cookies keep in an airtight container at room temperature for 4 to 5 days. Separate layers with parchment after the white chocolate has fully set. Keep them away from strongly spiced cookies if you want the mocha flavor to stay clean.
For a mixed box, set these beside crisp cranberry pistachio biscotti and chewy chewy gingersnap cookies. The three textures, dunkable, chewy and fudgy, make the assortment feel planned instead of repetitive.
Fully decorated baked cookies can be frozen for up to 1 month, but candy cane may lose some crunch after thawing. When quality matters most, freeze the dough or freeze undecorated baked cookies and finish them the day they are gifted.
Questions About Peppermint Mocha Cookies
Do peppermint mocha cookies taste strongly of coffee?
No. One tablespoon of instant espresso deepens the cocoa more than it announces coffee. Most tasters notice dark chocolate first, peppermint second and a roasty background note last. Use 2 teaspoons for an even softer mocha effect.
Can I replace instant espresso with brewed coffee?
Brewed coffee adds water and changes the dough, so it is not a direct substitute. Fine instant coffee can replace espresso powder in the same amount. Never use dry coffee grounds because they stay gritty.
Why is the 2 hour chill necessary for these cookies?
The chill firms the butter and lets flour and cocoa absorb moisture. Warm dough spreads quickly and gives thin, dry edges. Chilled dough holds its height long enough for the center to stay fudgy.
My peppermint flavor tastes too sharp. What went wrong?
The extract was probably overmeasured or a mint blend was used instead of peppermint extract. Measure over a separate dish and use 3/4 teaspoon for the batch. Vanilla and candy cane should support the peppermint, not compete with it.
Why did the crushed candy cane melt or turn sticky?
It was likely added to warm cookies or stored before the white chocolate set. Decorate completely cool cookies, sprinkle while the stripes are wet, then let everything set for 30 minutes in a dry room.
Can I use natural cocoa instead of Dutch process cocoa?
Yes, with a lighter color and slightly sharper chocolate flavor. Keep the same amount and the same baking soda for this batch size. The centers remain soft if the short bake and full chill are preserved.
Dark, Cool and Ready for the Exchange
Peppermint mocha cookies bring the polish of a coffeehouse drink to a homemade cookie tray. Their dark crumb, white stripes and red flecks need no extra decoration to belong in December.
The method is calm when the order is respected: bloom the espresso in butter, chill the dough, stop the bake early and decorate only when the cookies are cool. Each step protects either flavor, texture or appearance.
Break one open before the box is closed. If the center is dense and glossy and the peppermint lands after the chocolate, the batch is exactly where it should be.
Nutrition per cookie, estimated for 24 cookies: Calories 190, Total Fat 10 g, Saturated Fat 6 g, Unsaturated Fat 3 g, Trans Fat 0 g, Carbohydrates 25 g, Fiber 2 g, Sugar 17 g, Protein 2 g, Sodium 95 mg, Cholesterol 30 mg. For consistent scooping and baking times, the King Arthur Baking ingredient weight chart is a useful reference.
Print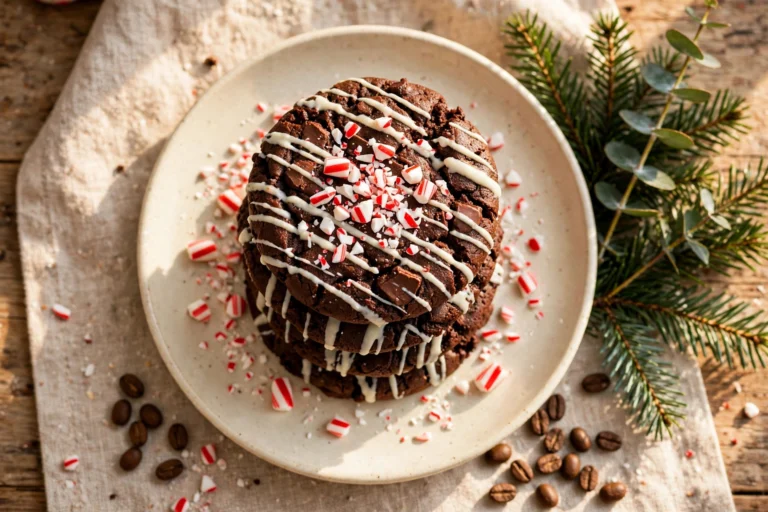
Peppermint Mocha Cookies
Fudgy peppermint mocha cookies made with espresso beaten into the butter, Dutch process cocoa, a two hour chill and a short bake. Finished with white chocolate stripes and crushed candy cane, with freezer and cookie box plans.
- Total Time: 2 hours 40 minutes
- Yield: 24 cookies 1x
Ingredients
- 3/4 cup (170 g) unsalted butter, at cool room temperature
- 3/4 cup (150 g) packed dark brown sugar
- 1/2 cup (100 g) granulated sugar
- 1 tablespoon instant espresso powder
- 1 large egg, at room temperature
- 1 large egg yolk, at room temperature
- 2 teaspoons vanilla extract
- 3/4 teaspoon peppermint extract
- 1 3/4 cups (220 g) all purpose flour
- 2/3 cup (60 g) Dutch process cocoa powder
- 1 tablespoon cornstarch
- 1 teaspoon baking soda
- 1/2 teaspoon fine salt
- 1 cup (170 g) semisweet chocolate chips
- 4 ounces (115 g) white chocolate, chopped, for the stripes
- 1/3 cup (55 g) crushed candy canes, for topping
Instructions
- Beat the butter, brown sugar, granulated sugar and instant espresso powder for 2 to 3 minutes, until lighter in color and fluffy. Scrape the bowl once so no plain butter stays at the bottom.
- Beat in the egg, then the egg yolk, mixing until each is absorbed. Add the vanilla and peppermint extracts and mix until the dough looks smooth and glossy.
- Whisk the flour, cocoa powder, cornstarch, baking soda and salt in a separate bowl until the mixture is one even dark color.
- Add the dry ingredients to the butter mixture in two additions. Mix on low only until no flour or cocoa streaks remain. The dough will be thick and sticky.
- Fold in the semisweet chocolate chips with a spatula, reaching to the bottom of the bowl so the chips are evenly distributed.
- Cover and refrigerate the dough for at least 2 hours and up to 48 hours. This rest hydrates the cocoa and flour and firms the butter for thick cookies.
- Heat the oven to 350°F (175°C). Line two baking sheets with parchment. Let very cold dough stand at room temperature for 10 minutes so it can be scooped cleanly.
- Scoop 2 tablespoon portions and roll them into balls. Place them 2 inches apart on the prepared sheets, keeping the remaining dough refrigerated between batches.
- Bake one sheet at a time for 10 to 12 minutes, until the edges look set and the centers still appear slightly soft and puffed.
- Cool on the baking sheet for 10 minutes. The centers will finish setting as they cool. Move the cookies to a wire rack and cool completely before decorating.
- Melt the white chocolate gently in short microwave bursts, stirring between each. Drizzle thin stripes over the cold cookies and sprinkle immediately with crushed candy cane.
- Let the topping set for 30 minutes at room temperature before stacking or boxing the cookies.
- Prep Time: 25 minutes
- Cook Time: 12 minutes
Nutrition
- Serving Size: 1
- Calories: 190
- Sugar: 17
- Sodium: 95
- Fat: 10
- Saturated Fat: 6
- Unsaturated Fat: 3
- Trans Fat: 0
- Carbohydrates: 25
- Fiber: 2
- Protein: 2
- Cholesterol: 30